In-process Measurement for Gear Eccentricity
Takaaki OIWA and Osamu YOSHIDA
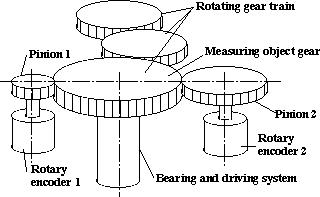
This paper describes a measuring method for the eccentricity and some lower-order transmission errors of the rotating gear. The amplitude and the phase of the eccentricity are estimated by the harmonic analysis on the transmission error between two pinion gears meshing together the object gear. This method measures not only the gear eccentricity generated during the manufacturing process but also runout and deflections of the gear shaft and its bearings during operation. The transmission error of the meshing three gear system was measured by two encoders and a pulse counter connecting to the personal computer. The amplitude and the phase of the gear eccentricity were calculated by the fast Fourier transformation independently of the systematic errors and the misalignments of the pinion gears and the encoders. After adjustment of the center of the object gear using an r-q stage with a micrometer head , the eccentricity decreased considerably from 262 micrometers to 12 micrometers.
Key words: gear eccentricity, transmission error, in-process measurement, eccentric gears, fast Fourier transformation

Figure Measurement setup for transmission error of the rotating gear train

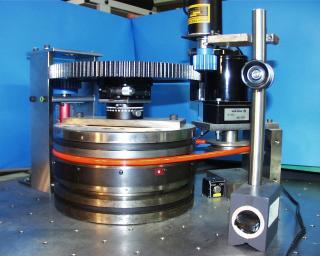
Figure General view of experimental setup for measurement of ecentricity
References
to Oiwa Lab. Home Page
Copyright (C) 1997 OIWA Laboratory All Rights Reserved.


 Takaaki OIWA and Osamu YOSHIDA
 Takaaki OIWA and Osamu YOSHIDA